


AI Renderer 2.0 - Free ComfyUI Workflow for AI-Powered 3D Animation Rendering
AI Renderer 2.0 - Free ComfyUI Workflow for AI-Powered 3D Animation Rendering
[FULL GUIDE]
᛫
Feb 25, 2026
᛫
by Mickmumpitz
Render your 3D animations with AI using this free ComfyUI workflow. Export control images like line art or depth maps from Blender, set a start frame for style, and generate fully stylized video output — no cloud subscription needed. The standard workflow handles single-pass clips up to ~121 frames. For longer sequences, the advanced workflow uses iterative generation with automatic frame blending, resume support, and custom nodes built for a smooth experience. Compatible with WAN 2.2, Phantom references, and multiple control inputs.
Render your 3D animations with AI using this free ComfyUI workflow. Export control images like line art or depth maps from Blender, set a start frame for style, and generate fully stylized video output — no cloud subscription needed. The standard workflow handles single-pass clips up to ~121 frames. For longer sequences, the advanced workflow uses iterative generation with automatic frame blending, resume support, and custom nodes built for a smooth experience. Compatible with WAN 2.2, Phantom references, and multiple control inputs.
Installation
Download the workflow and drag it into ComfyUI. Install any missing custom nodes if prompted. If you need a step-by-step video guide, you can watch this video.
Download Models
Model download links are included directly inside the workflow. Each model loader on the left side of the canvas shows the download URL and the correct folder path. Follow those links and place each file in the specified directory.
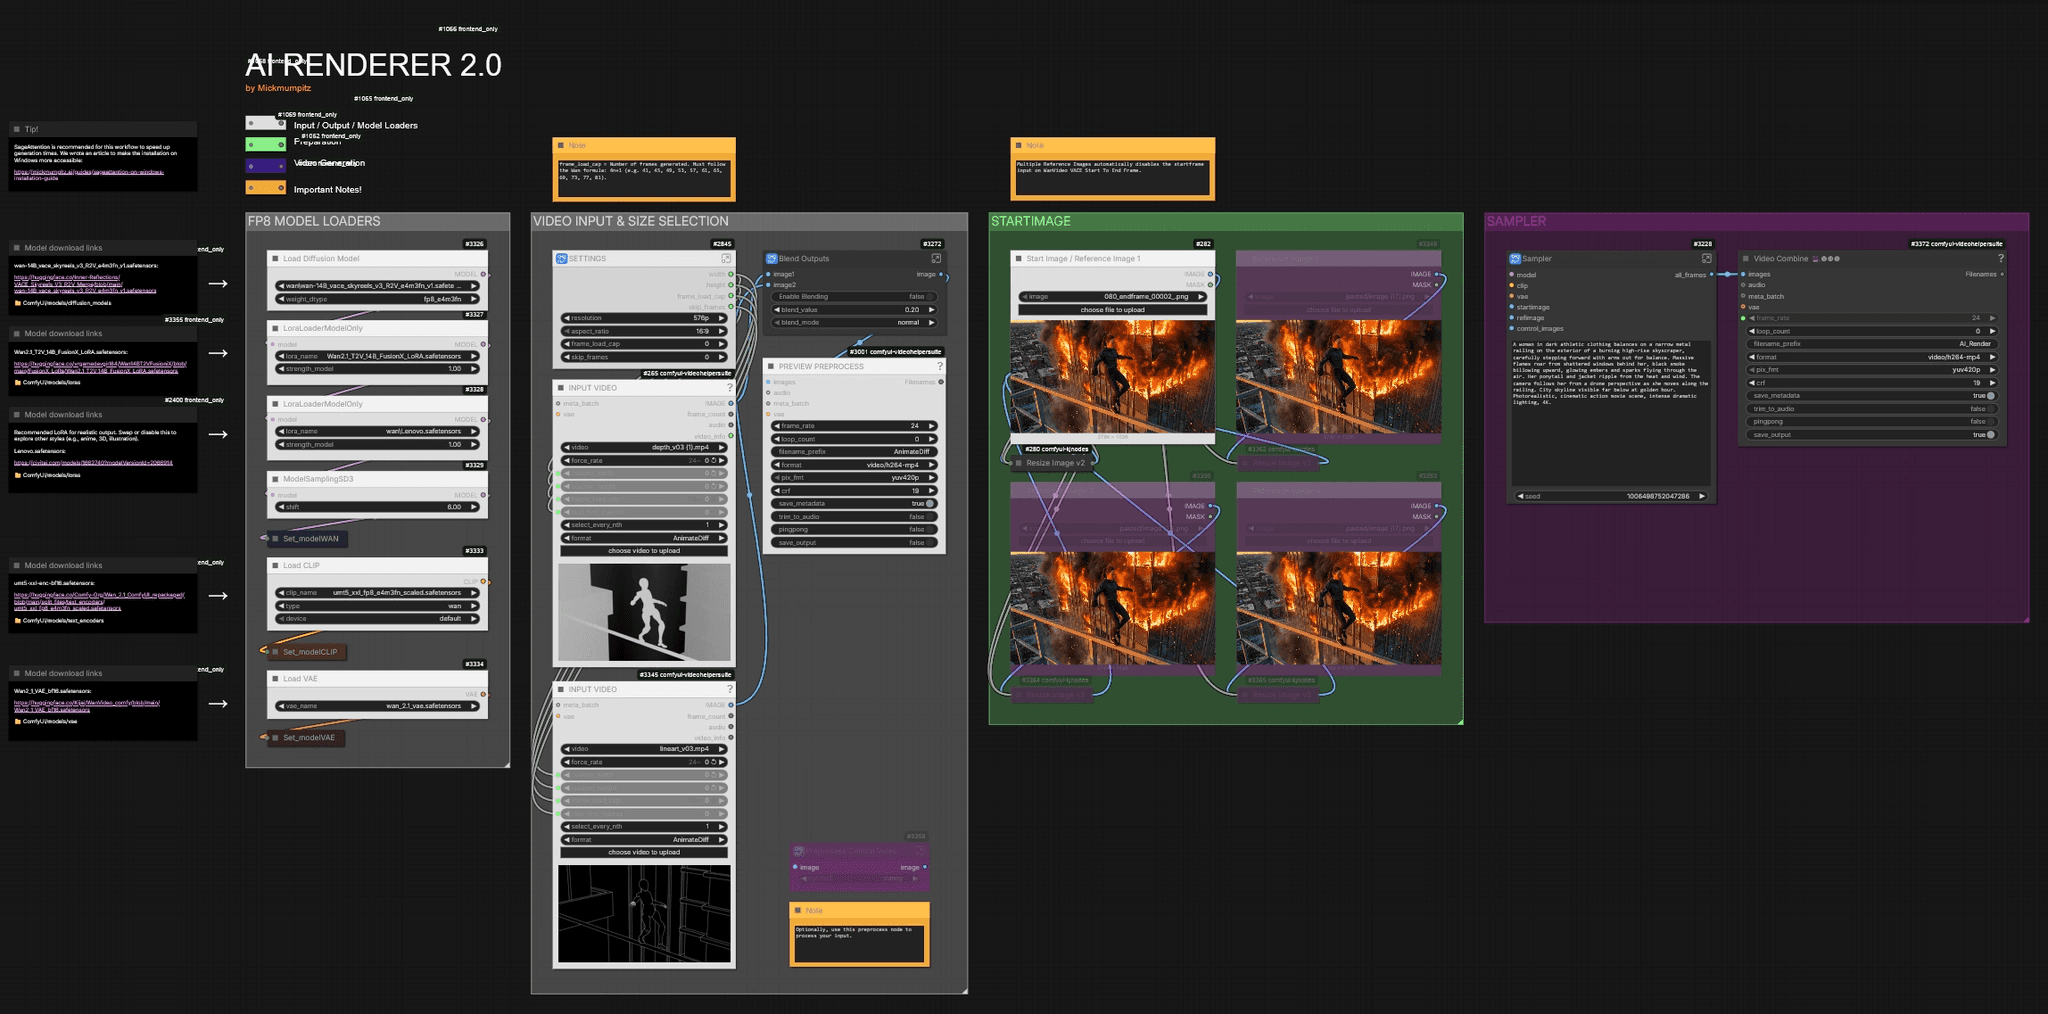
🎨 Workflow Sections
⬜ Model Loaders / Input / Settings
🟩 Start Image / Reference Images
🟪 Video Generation
🟨 Important Notes
Installation
Download the workflow and drag it into ComfyUI. Install any missing custom nodes if prompted. If you need a step-by-step video guide, you can watch this video.
Download Models
Model download links are included directly inside the workflow. Each model loader on the left side of the canvas shows the download URL and the correct folder path. Follow those links and place each file in the specified directory.
🎨 Workflow Sections
⬜ Model Loaders / Input / Settings
🟩 Start Image / Reference Images
🟪 Video Generation
🟨 Important Notes
You can find the WORKFLOWS & EXAMPLE FILES here:

Before You Begin: Thank you for considering supporting us! Since these workflows can be complex, we recommend testing the free versions first to ensure compatibility with your system. We cannot guarantee full compatibility with every system that's why we always provide the main functionalities for free! Please take a moment to read through the entire guide. If you encounter any issues:
|
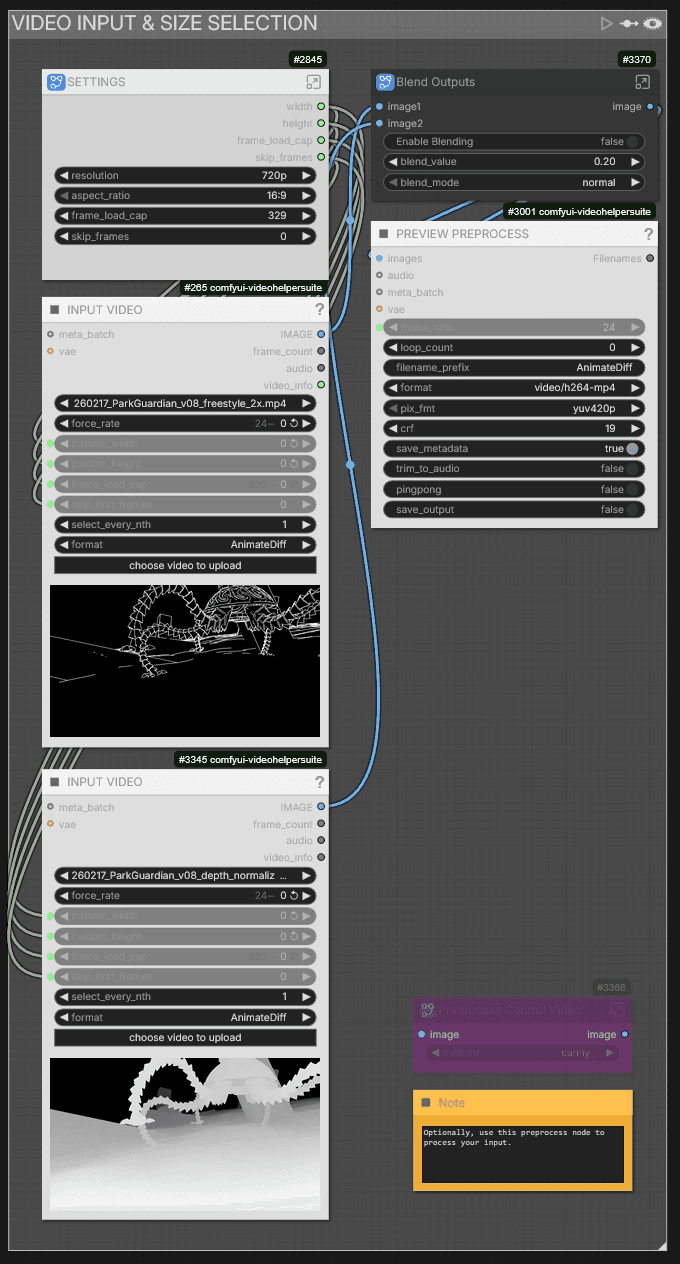
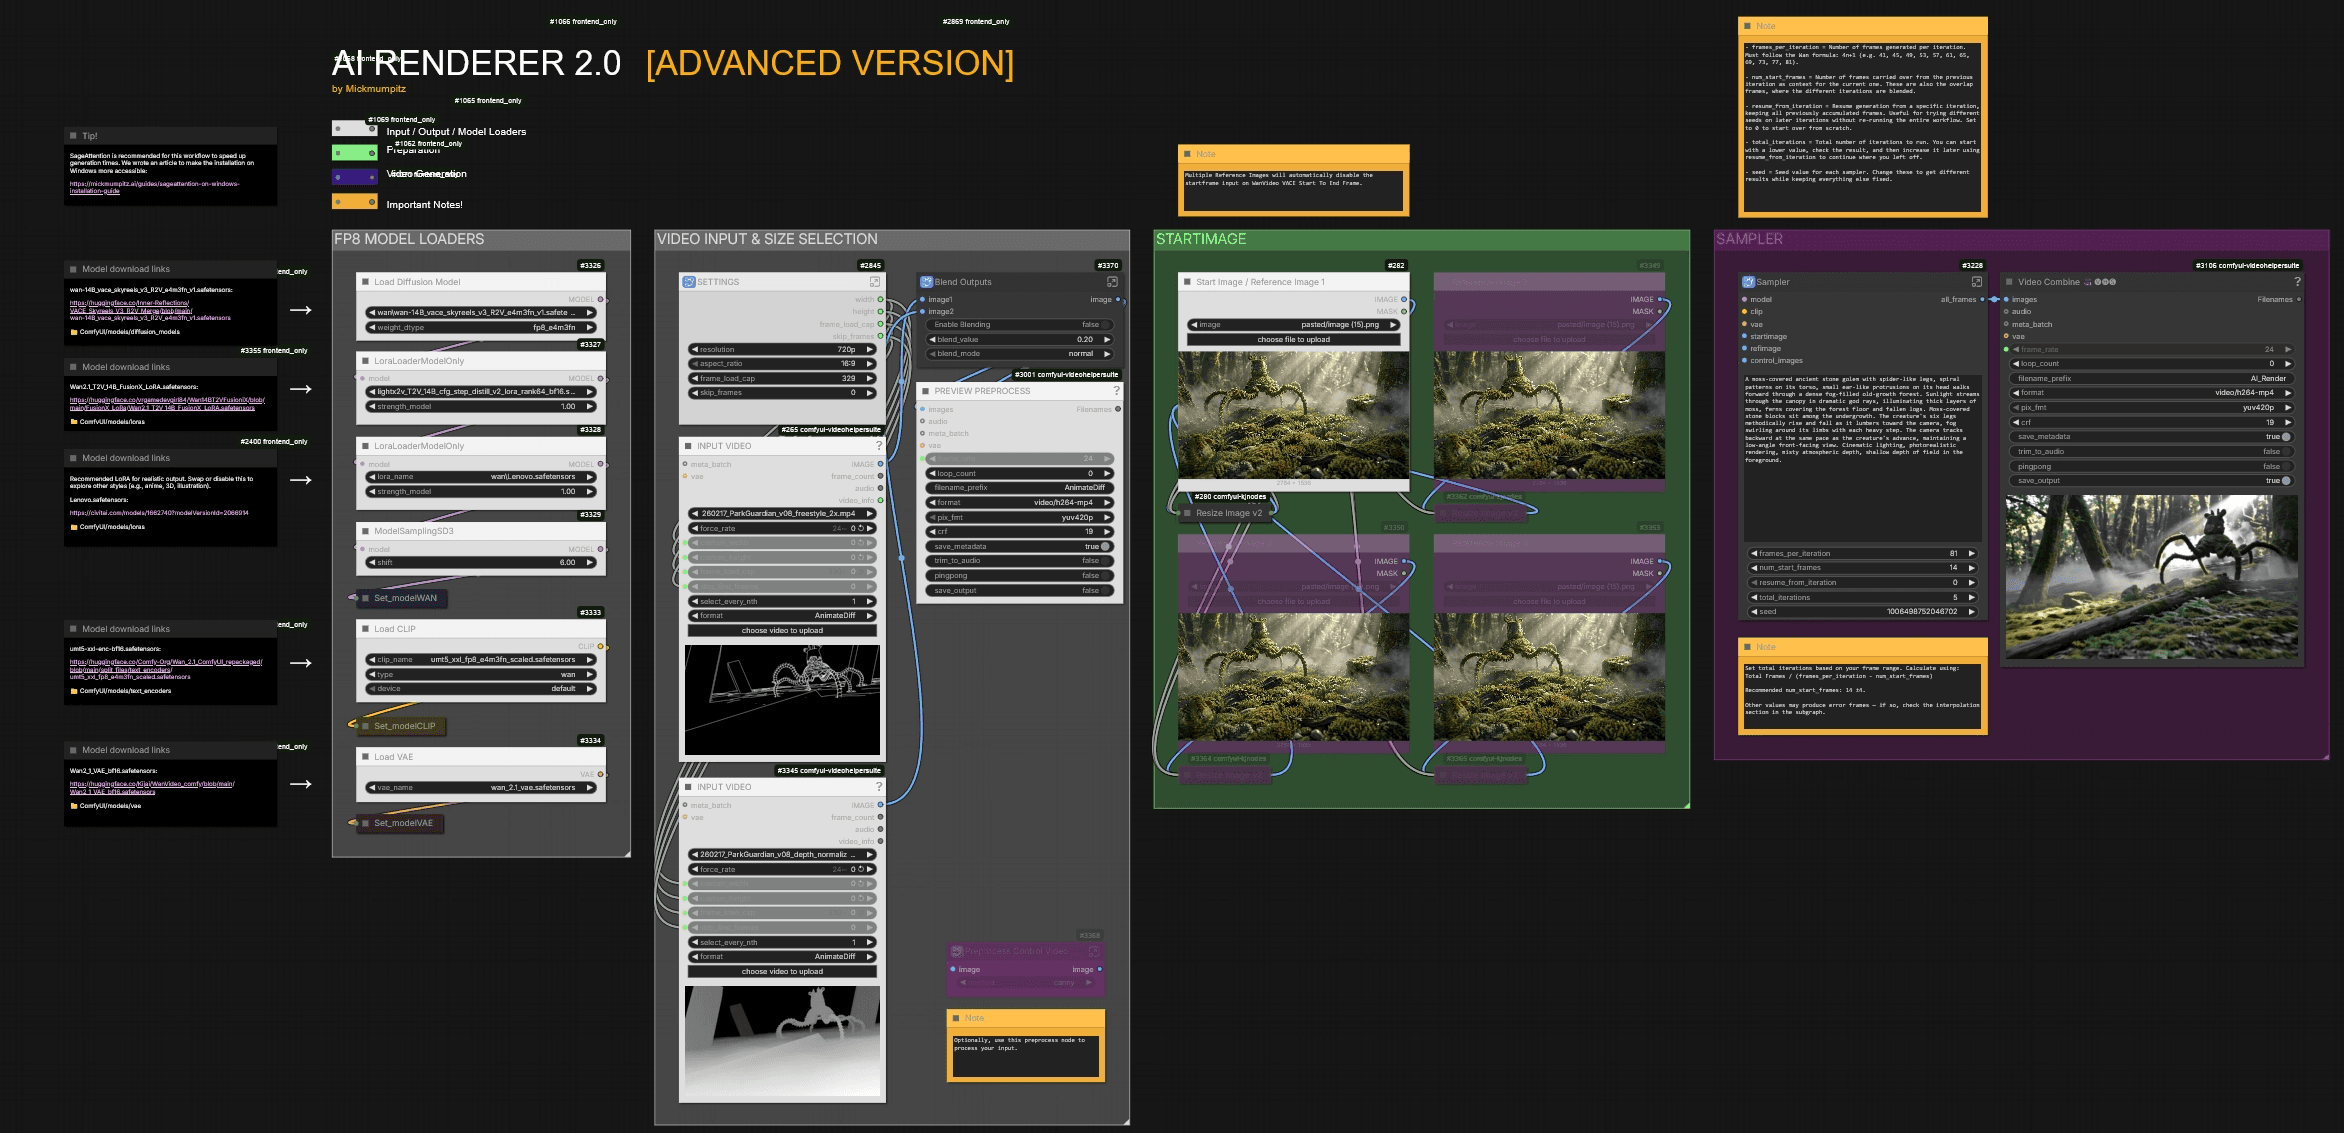
Video Input & Size Selection
After uploading your control video, you can adjust the resolution and aspect ratio in the Settings node.
You can load two input videos — for example a line art render and a depth render. If you want to blend multiple control inputs, enable Blending in the Blend Outputs node. We use line art with 20% depth, but line art alone often works fine too.
If your control videos aren't pre-processed yet, you can use the AI-RENDERER REPROCESS [INSERT GitHub Link] workflow or use the Preprocess Control Video node to process your input directly inside the workflow.
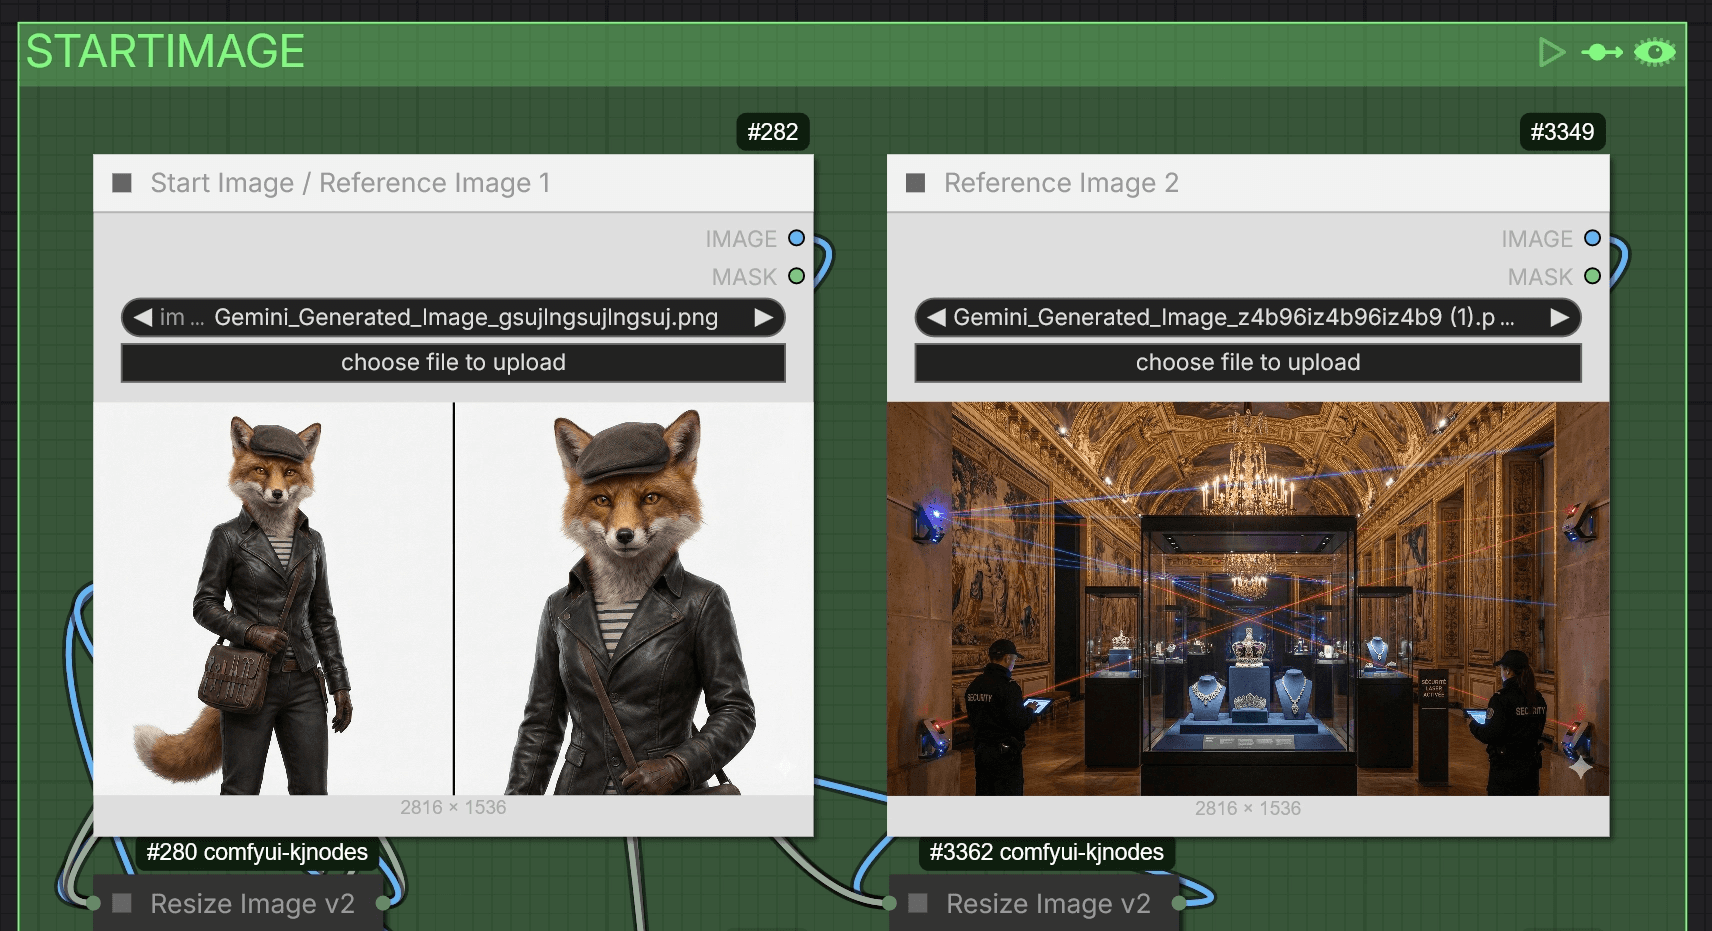
Start Image
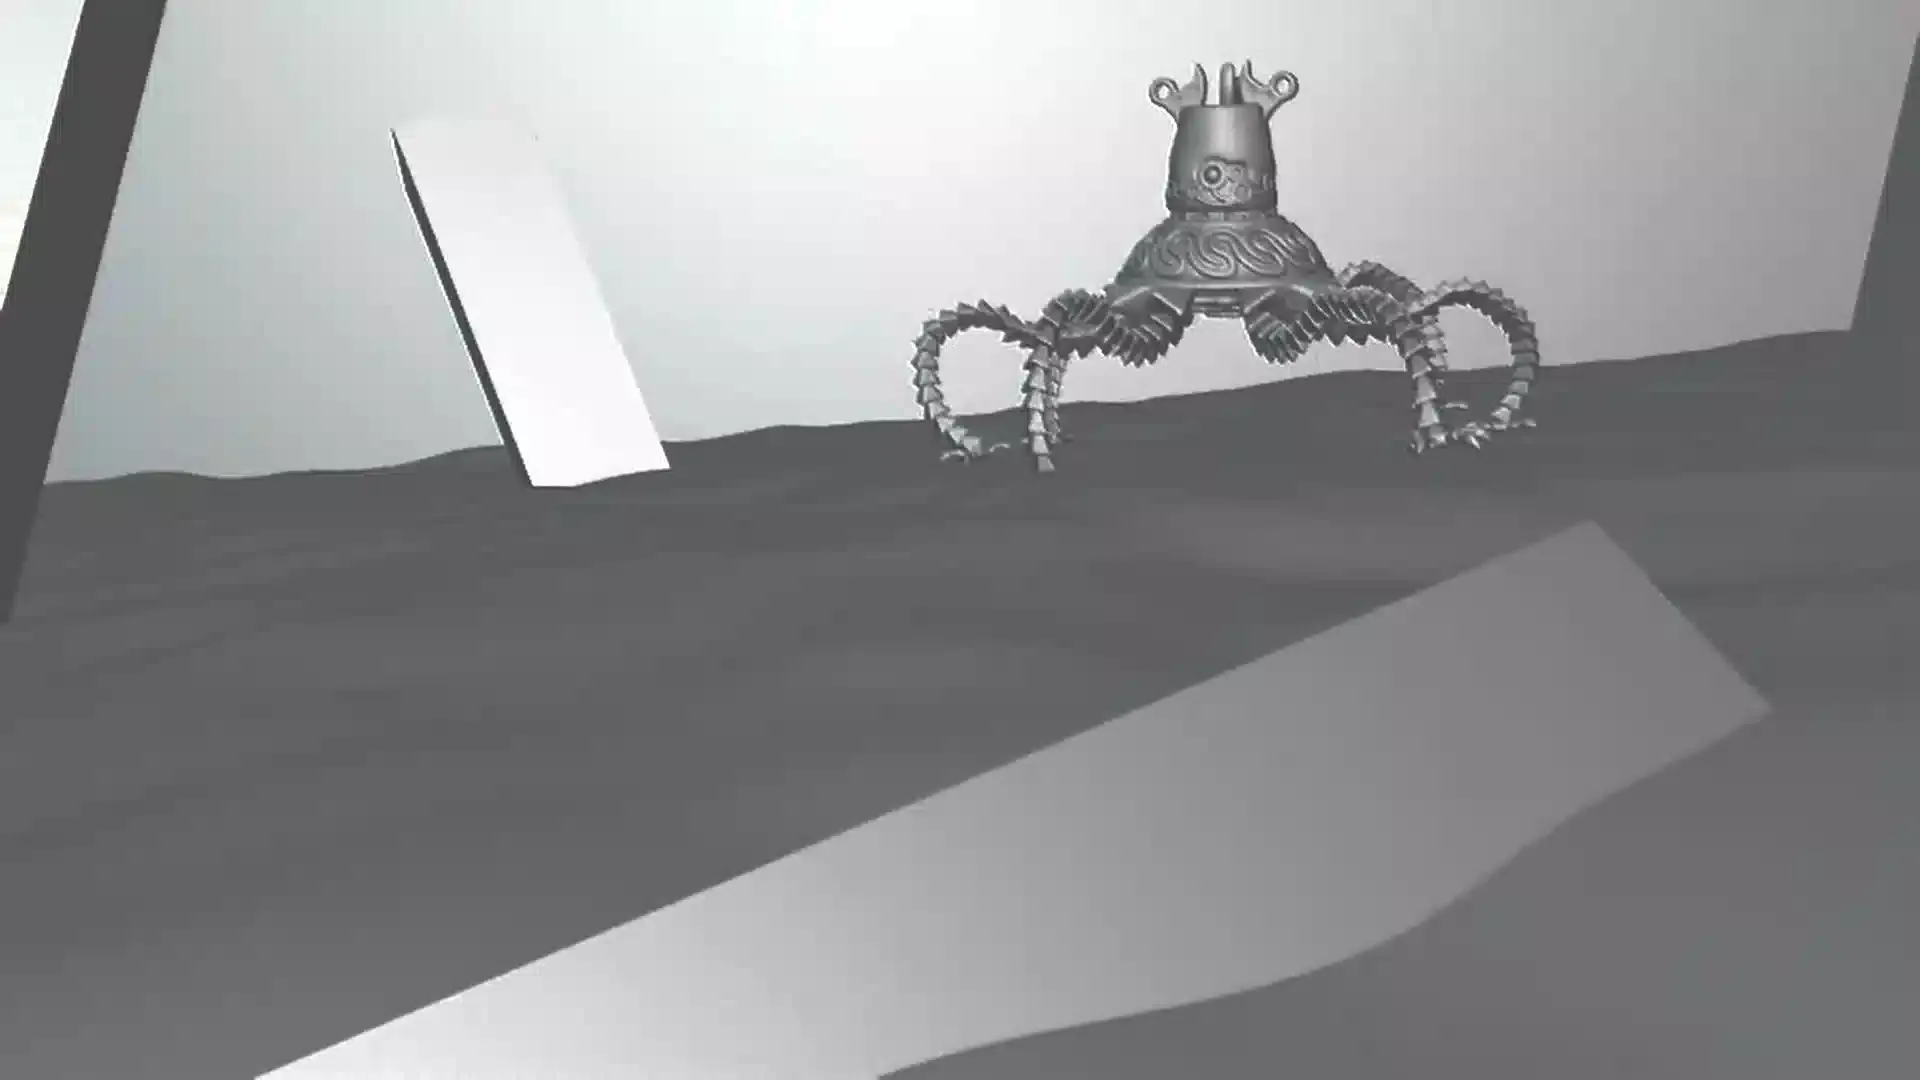
Upload your start image here. This is the frame that defines the visual style for the entire generation.
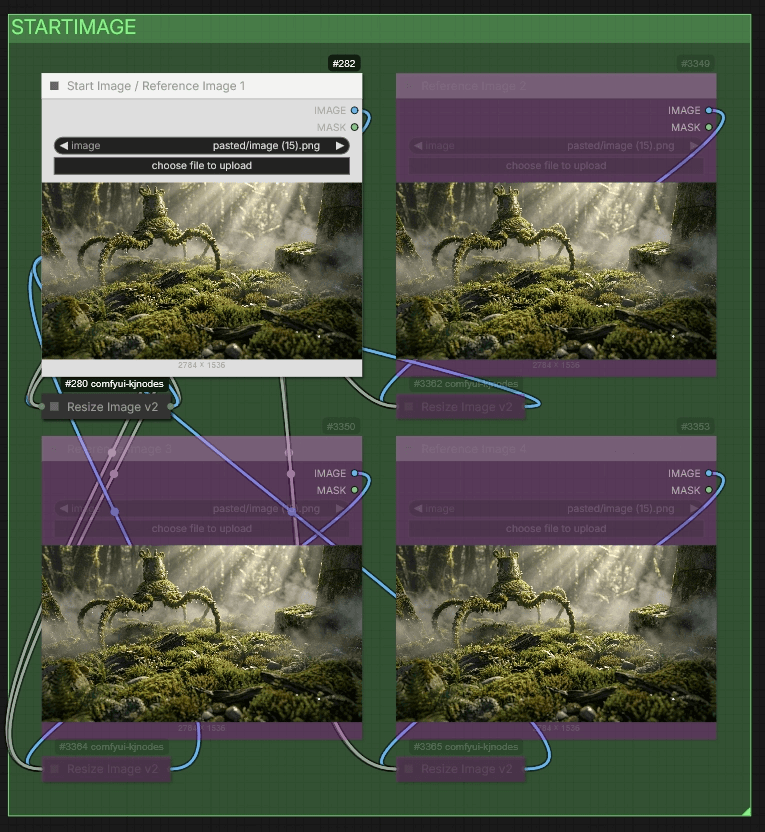
The workflow automatically supports the Phantom reference method. If you upload more than one image, it disables the start image method and uses the images as references instead. With the Phantom method, you can input a character and background separately—they're processed automatically. The workflow supports up to four reference images.
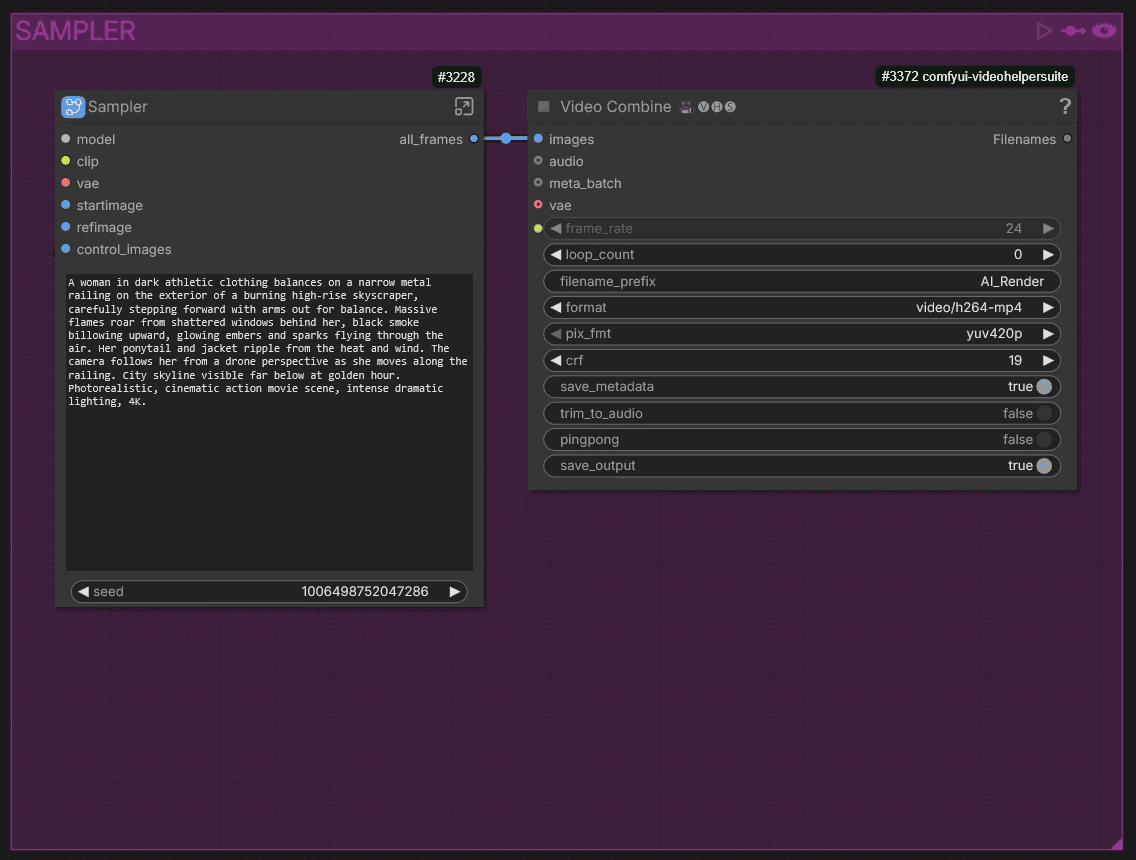
Sampler
This is where the generation happens. Write your prompt describing the scene you want to render.
Guide for the ADVANCED workflow
The advanced workflow supports iterative generation for longer videos. We built custom nodes so the iterative process works comfortably. If your clip is longer than what a single pass can handle (something between 81 - 121 frames), this is the workflow to use.
⚠️ Important: The advanced workflow can only run one job at a time. Running multiple jobs with different inputs (e.g. different start images) will cause bleeding between versions in the iteration chain.
🎨 Workflow Sections — Advanced
⬜ Model Loaders / Input / Settings
🟩 Start Image / Reference Images
🟪 Video Generation
🟨 Important Notes
Sampler — Advanced
The advanced sampler adds several parameters for iterative generation:
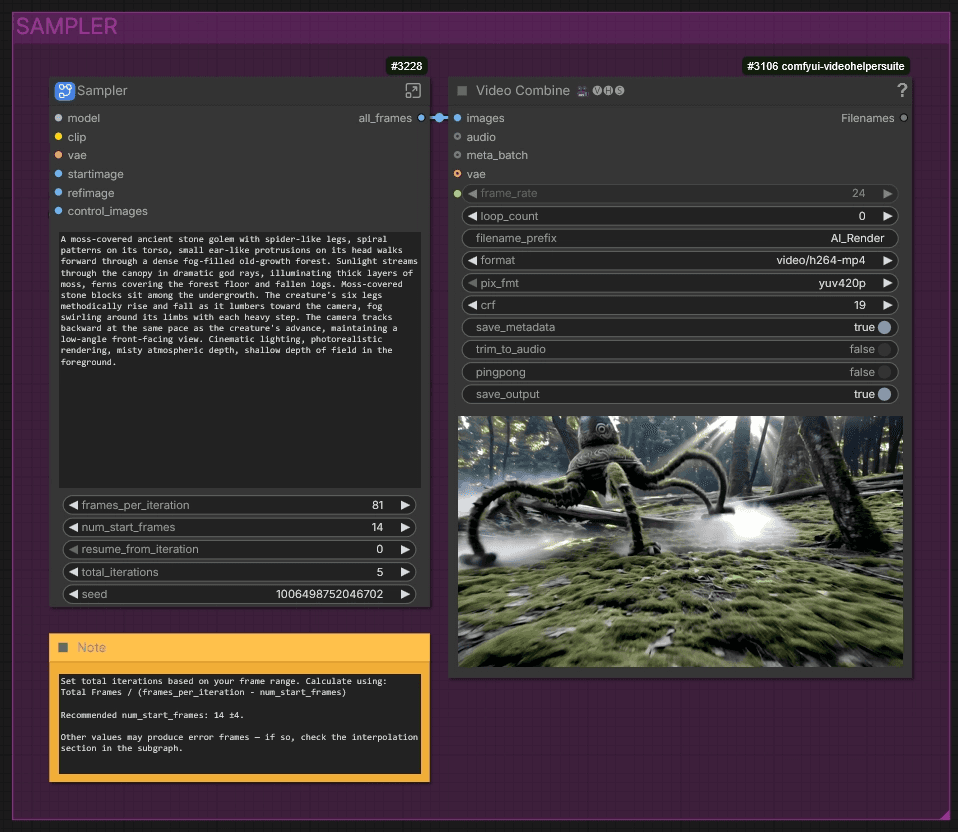
First, set your frames_per_iteration. This value must follow the WAN formula: 4n+1 (e.g. 41, 45, 49, 53, 57, 61, 65, 69, 73, 77, 81).
Next, set num_start_frames. This dictates how many frames are carried over from the previous iteration into the next one. It helps with context and consistency, and these frames are also used to blend between iterations. Be aware that after each iteration, the next one starts a few frames earlier — so the higher this value, the more iteration are needed. Since the WAN model works within 4-frame contexts, picking a value in the middle of that context helps avoid error frames. We had good results with a value of 14. If you do encounter error frames, check the interpolation section inside the subgraph to fix them.
The seed controls the randomness of the sampler. Change it to get different results while keeping everything else fixed.
Below that, you set total_iterations — this is how many times the workflow runs through your clip. For example, if you set it to 5, the workflow will iterate 5 times across the full frame range. You can start with a lower value, check the result, and increase it later.
Calculate the number of iterations you need like this:
Total Frames / (frames_per_iteration − num_start_frames)
If you see an error on a specific iteration — say iteration 3 — you don't have to restart the whole thing. Use resume_from_iteration to pick up from that exact point. You can also change the seed without starting from the beginning. Set it to 0 to start from scratch.
Video Input & Size Selection
After uploading your control video, you can adjust the resolution and aspect ratio in the Settings node.
You can load two input videos — for example a line art render and a depth render. If you want to blend multiple control inputs, enable Blending in the Blend Outputs node. We use line art with 20% depth, but line art alone often works fine too.
If your control videos aren't pre-processed yet, you can use the AI-RENDERER REPROCESS [INSERT GitHub Link] workflow or use the Preprocess Control Video node to process your input directly inside the workflow.
Start Image
Upload your start image here. This is the frame that defines the visual style for the entire generation.
The workflow automatically supports the Phantom reference method. If you upload more than one image, it disables the start image method and uses the images as references instead. With the Phantom method, you can input a character and background separately—they're processed automatically. The workflow supports up to four reference images.
Sampler
This is where the generation happens. Write your prompt describing the scene you want to render.
Guide for the ADVANCED workflow
The advanced workflow supports iterative generation for longer videos. We built custom nodes so the iterative process works comfortably. If your clip is longer than what a single pass can handle (something between 81 - 121 frames), this is the workflow to use.
⚠️ Important: The advanced workflow can only run one job at a time. Running multiple jobs with different inputs (e.g. different start images) will cause bleeding between versions in the iteration chain.
🎨 Workflow Sections — Advanced
⬜ Model Loaders / Input / Settings
🟩 Start Image / Reference Images
🟪 Video Generation
🟨 Important Notes
Sampler — Advanced
The advanced sampler adds several parameters for iterative generation:
First, set your frames_per_iteration. This value must follow the WAN formula: 4n+1 (e.g. 41, 45, 49, 53, 57, 61, 65, 69, 73, 77, 81).
Next, set num_start_frames. This dictates how many frames are carried over from the previous iteration into the next one. It helps with context and consistency, and these frames are also used to blend between iterations. Be aware that after each iteration, the next one starts a few frames earlier — so the higher this value, the more iteration are needed. Since the WAN model works within 4-frame contexts, picking a value in the middle of that context helps avoid error frames. We had good results with a value of 14. If you do encounter error frames, check the interpolation section inside the subgraph to fix them.
The seed controls the randomness of the sampler. Change it to get different results while keeping everything else fixed.
Below that, you set total_iterations — this is how many times the workflow runs through your clip. For example, if you set it to 5, the workflow will iterate 5 times across the full frame range. You can start with a lower value, check the result, and increase it later.
Calculate the number of iterations you need like this:
Total Frames / (frames_per_iteration − num_start_frames)
If you see an error on a specific iteration — say iteration 3 — you don't have to restart the whole thing. Use resume_from_iteration to pick up from that exact point. You can also change the seed without starting from the beginning. Set it to 0 to start from scratch.
© 2025 Mickmumpitz
© 2025 Mickmumpitz
© 2025 Mickmumpitz