


Replacing Actors in Videos with ComfyUI and WanVideo
Replacing Actors in Videos with ComfyUI and WanVideo
[FULL GUIDE]
᛫
Apr 28, 2025
᛫
by Mickmumpitz
Introduction
Want to swap out a person in your video with a completely new character — and do it on your own PC?
In this tutorial, we’ll walk you through a powerful AI video workflow using ComfyUI and the WanVideo model to replace characters frame-by-frame, without relying on cloud services.
We start by taking a single frame from your video and replacing the person using a custom inpainting setup. Then, using a ControlNet, we extend that character across the entire clip — keeping the motion and environment consistent.
This workflow gives you full control over character replacement, all powered by open-source tools and local models. Whether you're an indie filmmaker, a content creator, or just experimenting with AI video — this guide will show you how to get cinematic results without a studio budget.
Let’s get started.
🎨 Workflow Sections
🟨 Important Notes
⬜ Input / Output / Model Loaders
🟩 Prompt / Conditioning
🟪 ControlNets / Adapters
🟥 Latent / Sampling

Installation
Download the .json file and drag and drop it into your ComfyUI window.
Install the missing custom nodes via the manager and restart ComfyUI.
Download Models
Wan2.1-Fun-1.3B-Control:
[RECOMMENDED] 1.3B BF16
https://huggingface.co/alibaba-pai/Wan2.1-Fun-1.3B-Control/blob/main/diffusion_pytorch_model.safetensors
📁 ComfyUI/models/diffusion_models
umt5_xxl_fp8_e4m3fn_scaled.safetensors:
https://huggingface.co/Comfy-Org/Wan_2.1_ComfyUI_repackaged/blob/main/split_files/text_encoders/umt5_xxl_fp8_e4m3fn_scaled.safetensors
📁 ComfyUI/models/text_encoders
wan2_1_vae:
https://huggingface.co/Comfy-Org/Wan_2.1_ComfyUI_repackaged/blob/main/split_files/vae/wan_2.1_vae.safetensors
📁 ComfyUI/models/vae
clip_vision_h:
https://huggingface.co/Comfy-Org/Wan_2.1_ComfyUI_repackaged/blob/main/split_files/clip_vision/clip_vision_h.safetensors
📁 ComfyUI/models/clip_vision
depth_anything_v2_vitl_fp32.safetensors:
This should download automatically. Otherwise search for "Depth Anything" in the ComfyUI Model Manager and install:
kijai/DepthAnythingV2 (vitl/fp16)
🎨 Workflow Sections
🟨 Important Notes
⬜ Input / Output / Model Loaders
🟩 Prompt / Conditioning
🟪 ControlNets / Adapters
🟥 Latent / Sampling
Installation
Download the .json file and drag and drop it into your ComfyUI window.
Install the missing custom nodes via the manager and restart ComfyUI.
Download Models
Wan2.1-Fun-1.3B-Control:
[RECOMMENDED] 1.3B BF16
https://huggingface.co/alibaba-pai/Wan2.1-Fun-1.3B-Control/blob/main/diffusion_pytorch_model.safetensors
📁 ComfyUI/models/diffusion_models
umt5_xxl_fp8_e4m3fn_scaled.safetensors:
https://huggingface.co/Comfy-Org/Wan_2.1_ComfyUI_repackaged/blob/main/split_files/text_encoders/umt5_xxl_fp8_e4m3fn_scaled.safetensors
📁 ComfyUI/models/text_encoders
wan2_1_vae:
https://huggingface.co/Comfy-Org/Wan_2.1_ComfyUI_repackaged/blob/main/split_files/vae/wan_2.1_vae.safetensors
📁 ComfyUI/models/vae
clip_vision_h:
https://huggingface.co/Comfy-Org/Wan_2.1_ComfyUI_repackaged/blob/main/split_files/clip_vision/clip_vision_h.safetensors
📁 ComfyUI/models/clip_vision
depth_anything_v2_vitl_fp32.safetensors:
This should download automatically. Otherwise search for "Depth Anything" in the ComfyUI Model Manager and install:
kijai/DepthAnythingV2 (vitl/fp16)
You can find the WORKFLOWS & EXAMPLE FILES here:

Before You Begin: Thank you for considering supporting us! Since these workflows can be complex, we recommend testing the free versions first to ensure compatibility with your system. We cannot guarantee full compatibility with every system that's why we always provide the main functionalities for free! Please take a moment to read through the entire guide. If you encounter any issues:
|
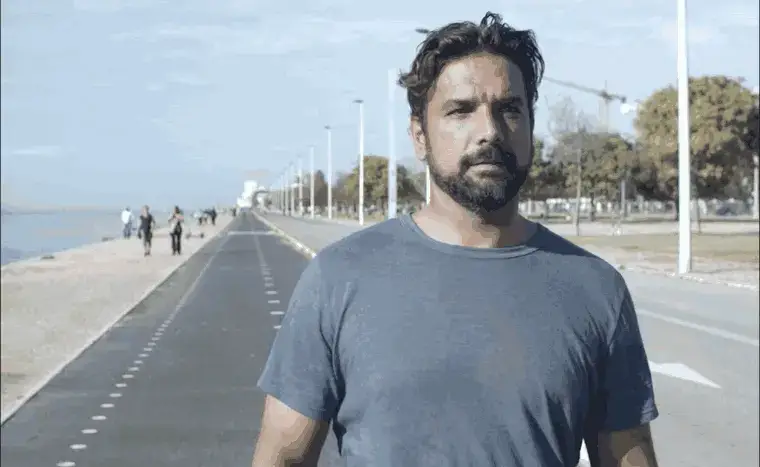
1. Video Input
Load Video
In this step, you load your source video into the workflow. The frame_load_cap is set to the recommended 81 frames, following WanVideo's guidelines. However, you’re free to adjust this value and experiment with different settings to suit your needs.
Resize Image
This node allows you to adjust the resolution of your video. Choosing a lower resolution will reduce the computational load and speed up the entire process — especially helpful if you're using less powerful hardware.

Start Frame
Here you insert the start frame you created in the inpainting workflow. Make sure this frame exactly matches the first frame of your video. This ensures that the new character stays aligned with the original video for a consistent final result.

Prompt
Enter your prompt here to define the appearance and actions of the new character.
We recommend describing both the look and the intended movement or pose in detail.
A clear and precise prompt ensures that the new character not only matches visually but also fits naturally into the movement and action of the video.

ControlNets
In this section, you’ll find the Fast Group Bypasser. This tool lets you selectively enable specific ControlNet groups, clearly labeled like "CN01_POSE" or "CN02_01_FACEMASH." Activate only the groups you need to achieve your desired effects. We'll go into more detail about the different groups in the next section.
You’ll also see the Video Combine setting. The frame rate is intentionally set to 16 FPS, because WanVideo internally operates at 16 FPS. Please keep this setting unchanged to avoid potential issues during sampling.

CN01_POSE
This group uses the DWPoseEstimator to convert body movements from the video into a pose schema. Pay attention to the enabled detection modes, such as detect_hand, detect_body, or detect_face.
If your character doesn’t have a humanoid face, "Detect Face" might not work well. In our film Samsa, we disabled this function because it was incompatible with the character design.
Adjust the settings according to your specific needs.

CN02_01_FACEMESH
This section is disabled by default. It becomes useful if you want to try a different method for lipsync. As you can see, only the mouth feature is currently enabled for lipsync.
However, feel free to experiment with other options to see what works best for your needs.

CN03_01_LINEART
In this step, the environment around the tracked pose is converted into Lineart, while the area of the replaced character is masked out.
This allows us to extract camera movements and background motion, and later apply them back to the start frame for consistent camera behavior.
Be sure to adjust the Grow Mask with Blur settings (size and blur radius) to fit the new character properly.
We deliberately avoid including Lineart over the replaced person to prevent transferring proportions or details from the original character to the new one.

CN04_DEPTH
At this stage, a Depth Map captures the depth information of the background and applies it to the start frame. This helps maintain realistic depth and movement in the generated video.
However, be cautious:
If your new character differs significantly from the original — for example, with a very different hairstyle — the Depth Map might introduce unwanted distortions.

05_WanVideo
In this section, you’ll find the KSampler.
The step count is currently set to 25, but you can adjust it as needed:
More steps (e.g., 30) → higher accuracy
Fewer steps (e.g., 20) → faster results, sometimes even more creative outputs
Higher steps make ControlNet applications more precise, while fewer steps might introduce creative variations. Adjust these settings to find the perfect balance between accuracy and creativity for your project.

1. Video Input
Load Video
In this step, you load your source video into the workflow. The frame_load_cap is set to the recommended 81 frames, following WanVideo's guidelines. However, you’re free to adjust this value and experiment with different settings to suit your needs.
Resize Image
This node allows you to adjust the resolution of your video. Choosing a lower resolution will reduce the computational load and speed up the entire process — especially helpful if you're using less powerful hardware.
Start Frame
Here you insert the start frame you created in the inpainting workflow. Make sure this frame exactly matches the first frame of your video. This ensures that the new character stays aligned with the original video for a consistent final result.
Prompt
Enter your prompt here to define the appearance and actions of the new character.
We recommend describing both the look and the intended movement or pose in detail.
A clear and precise prompt ensures that the new character not only matches visually but also fits naturally into the movement and action of the video.
ControlNets
In this section, you’ll find the Fast Group Bypasser. This tool lets you selectively enable specific ControlNet groups, clearly labeled like "CN01_POSE" or "CN02_01_FACEMASH." Activate only the groups you need to achieve your desired effects. We'll go into more detail about the different groups in the next section.
You’ll also see the Video Combine setting. The frame rate is intentionally set to 16 FPS, because WanVideo internally operates at 16 FPS. Please keep this setting unchanged to avoid potential issues during sampling.
CN01_POSE
This group uses the DWPoseEstimator to convert body movements from the video into a pose schema. Pay attention to the enabled detection modes, such as detect_hand, detect_body, or detect_face.
If your character doesn’t have a humanoid face, "Detect Face" might not work well. In our film Samsa, we disabled this function because it was incompatible with the character design.
Adjust the settings according to your specific needs.
CN02_01_FACEMESH
This section is disabled by default. It becomes useful if you want to try a different method for lipsync. As you can see, only the mouth feature is currently enabled for lipsync.
However, feel free to experiment with other options to see what works best for your needs.
CN03_01_LINEART
In this step, the environment around the tracked pose is converted into Lineart, while the area of the replaced character is masked out.
This allows us to extract camera movements and background motion, and later apply them back to the start frame for consistent camera behavior.
Be sure to adjust the Grow Mask with Blur settings (size and blur radius) to fit the new character properly.
We deliberately avoid including Lineart over the replaced person to prevent transferring proportions or details from the original character to the new one.
CN04_DEPTH
At this stage, a Depth Map captures the depth information of the background and applies it to the start frame. This helps maintain realistic depth and movement in the generated video.
However, be cautious:
If your new character differs significantly from the original — for example, with a very different hairstyle — the Depth Map might introduce unwanted distortions.
05_WanVideo
In this section, you’ll find the KSampler.
The step count is currently set to 25, but you can adjust it as needed:
More steps (e.g., 30) → higher accuracy
Fewer steps (e.g., 20) → faster results, sometimes even more creative outputs
Higher steps make ControlNet applications more precise, while fewer steps might introduce creative variations. Adjust these settings to find the perfect balance between accuracy and creativity for your project.
© 2025 Mickmumpitz
© 2025 Mickmumpitz
© 2025 Mickmumpitz